Contents
A brief overview of Content Controls
Pre-requisites for using Content Controls
Accessing the Content Controls section
Turning the standard Adult Content Filter on/off
Reviewing the Always Allowed and Always Blocked lists for your account
Managing the Always Allowed and Always Blocked lists for your account
Adding resources to the Always Allowed list
Adding resources to the Always Blocked list
Removing a resource from the Always Allowed or Always Blocked lists
A brief overview of Content Controls
Digital Theatre+ allows customers to decide which resources are made available to their users, through the means of our Content Controls feature. This allows you to enable or disable access to content by implementing a standard Adult Content Filter and/or configuring access to specific resources. The latter allows you to either:
- block specific individual resources you have deemed as inappropriate or undesirable for your students to access, for whatever reason
- allow your users to access specific resources which you have deemed as being appropriate or necessary for your students to access, perhaps because they are covered by your teaching syllabus
To help you understand what we mean by adult themes, please check out these related articles:
Pre-requisites for using Content Controls
In order to access Content Controls, you must be all of the following:
- Signed into Digital Theatre+ via https://edu.digitaltheatreplus.com
- Signed in as a named administrator for your account
- Accessing the platform using SSO or a username and password
Content Controls are not available when accessing Digital Theatre+ via IP Authentication.
Please see this Support article for further information.
If you access the platform in this way but still wish to be able to configure what content users of your account have access to, you will need to contact Customer Support so they can change your settings for you.
Accessing the Content Controls section
You can access the Content Controls feature by selecting the Content Controls option located in the user menu.
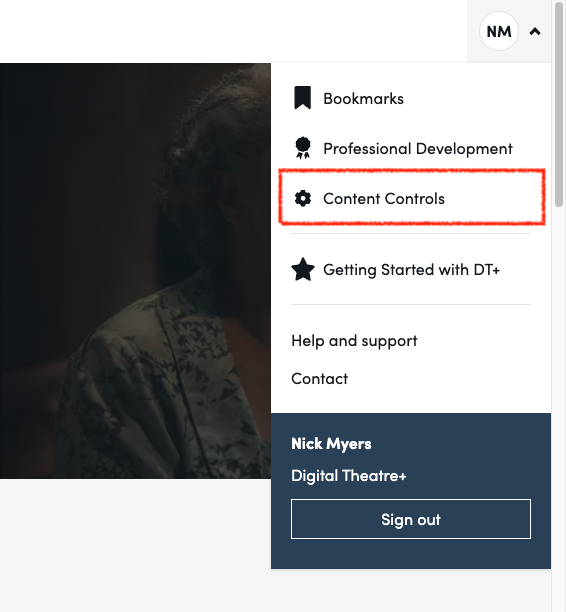
If the Control Controls option is not visible on the platform, the signed-in user is not a named administrator.
If you have not yet informed us of who your named administrator is, you will need to contact Customer Support to request the correct permissions.
Turning the standard Adult Content Filter on/off
If you simply want to enable or disable access to content with adult themes, you can review the current setting for each organisation within your account by visiting the Content Controls section. You can then either enable or disable the filter for each organisation as required.
Steps
- Review the current settings for each organisation
- Enable/disable the filter for any individual organisation by clicking on the button in the right-hand column labelled 'Access to content with adult themes' and toggling between the two settings
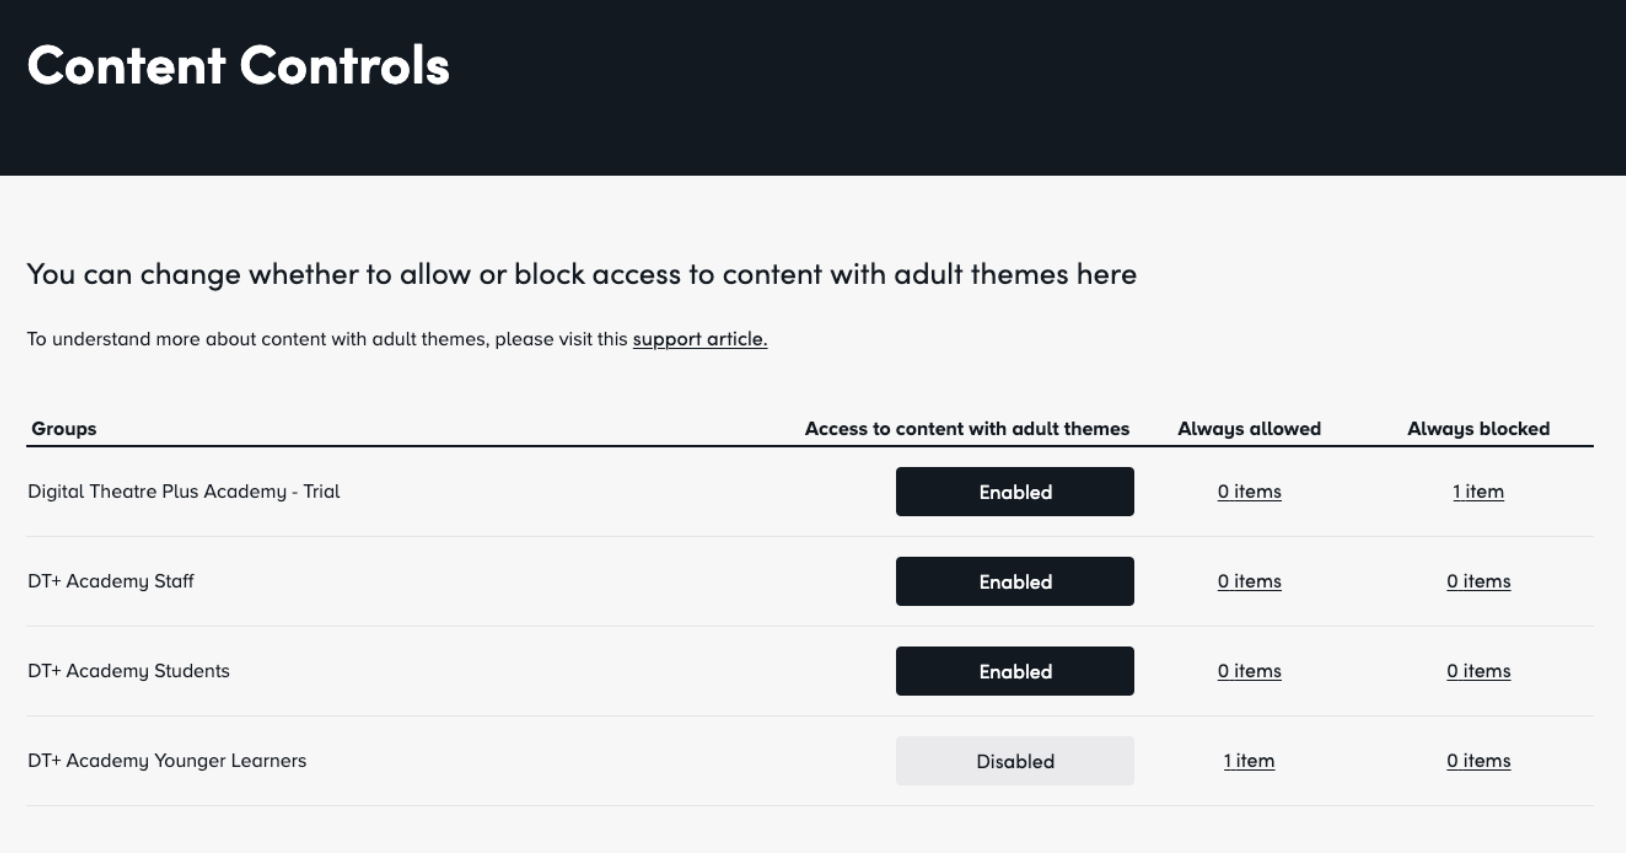
Reviewing the Always Allowed and Always Blocked lists for your account
Administrators can easily review which resources have been added to the Always Allowed or Always Blocked lists for each organisation, again via the Content Controls section of the site.
Steps
- Using the list of Organisations within your account, you can see an indicator of the number of resources currently added to either the Always Allowed or Always Blocked lists for each organisation
- To inspect which resources have been added to the relevant list, click on the indicator number for each organisation
- The dialogue displays all the resources added to the relevant list and allows you to navigate through to that individual resource by clicking on the resource name
Managing the Always Allowed and Always Blocked lists for your account
Whilst reviewing either the Always Allowed or Always Blocked lists, you can remove individual items from the list by clicking the “Remove” button. Please note that you can only remove items from these lists in Content Controls and you can not add or re-add items whilst in the Content Controls section.
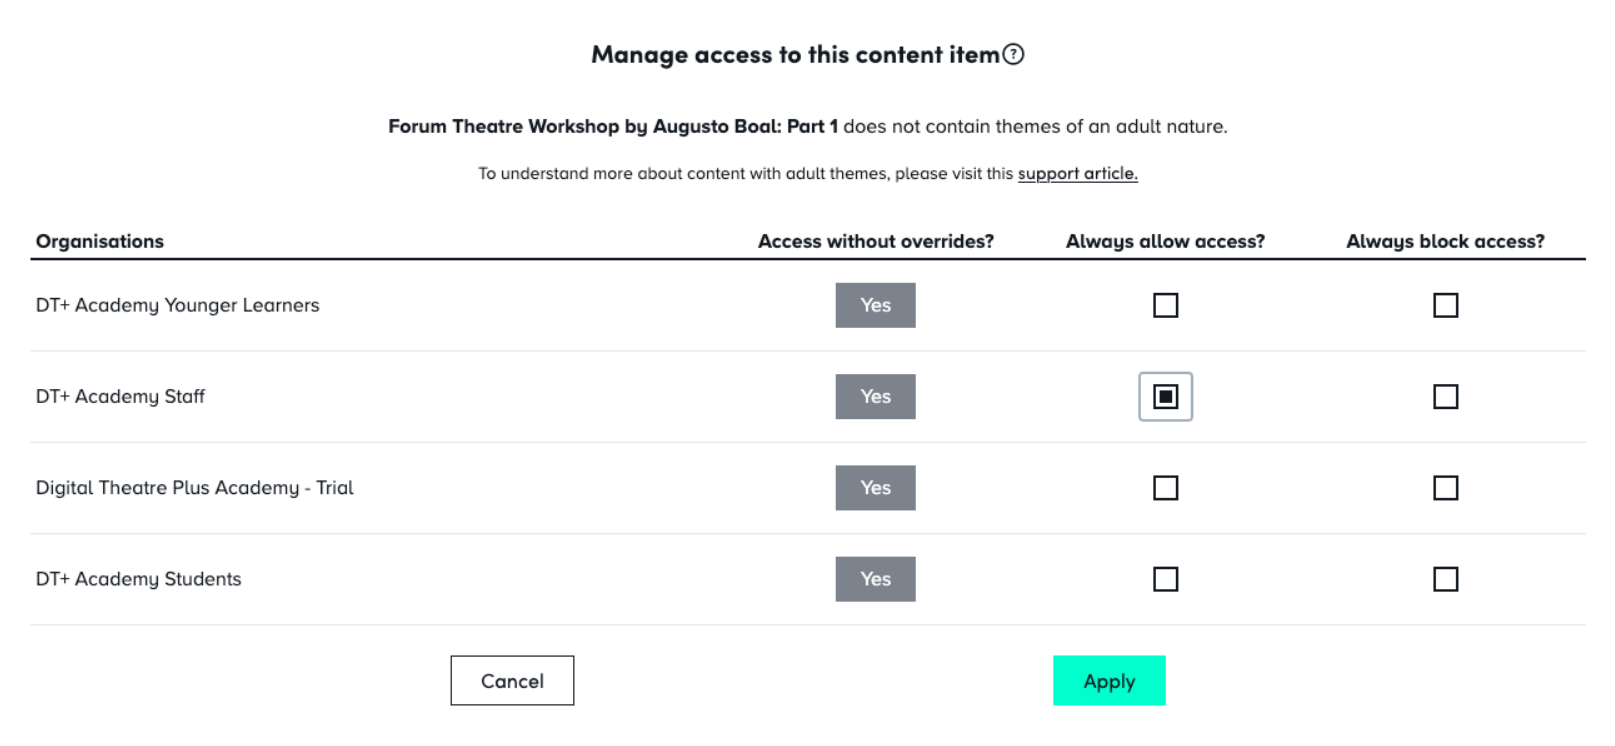
In order to add items to these lists, you will need to navigate to the specific resource page on the platform and then add that resource to either list by using the ''Manage content access'' button on the page. Please read on for further instructions on how to do this.
Adding resources to the Always Allowed list
Adding a resource to the Always Allowed list ensures that your users can access a particular resource, even if that resource is excluded for your users by the Adult Themes Content Filter.
This feature can be used when you wish to restrict access to content with adult themes but allow your users to access specific individual resources that contain adult themes because they relate to specific key texts or productions that your users are studying.
Steps
- Go to the page for the specific resource you wish to allow access to for your users
- Click on “Manage content access” located in the orange resource notification banner at the top of the page

- For a given organisation, find that organisation in the expanded drop-down and click the checkbox in the “Always allow access” column
- Once you have completed this, click “Apply” at the bottom of the expanded section to save these changes
Adding resources to the Always Blocked list
Adding a resource to the Always Blocked list ensures that your users cannot access specific resources that you have determined as being unsuitable for them.
This feature can be used when you wish to restrict access to specific individual resources, perhaps one not already covered by our standard Adult Content Filter due to only containing mild adult themes.
Steps
- Go to the page for the specific resource you wish to restrict access to for your users
- Click on “Manage content access” located in the orange resource notification banner at the top of the page

- For a given organisation, find that organisation in the expanded drop-down and click the checkbox in the “Always block access” column
- Once you have completed this, click “Apply” at the bottom of the expanded section to save these changes
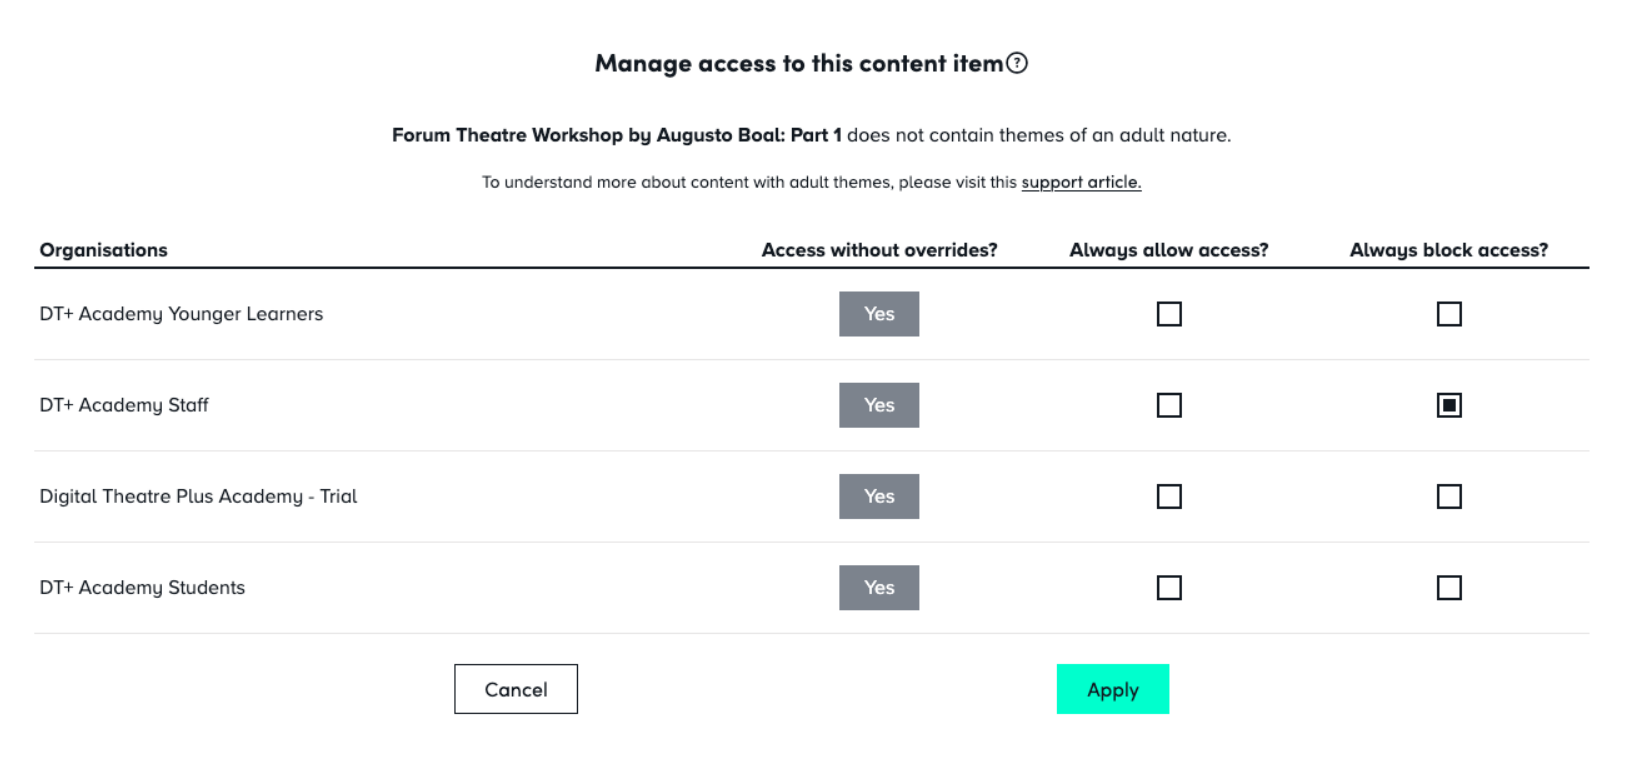
Tip: If both the “Always allow access” and “Always block access” are left unchecked, then permission to access that resource will be determined by the value present in “Access without overrides?” column
Removing a Resource from the Always Allowed or Always Blocked List
Items can be easily removed from the Always Allowe or Always Blocke lists for each organisation within your account by either:
- visiting the individual resource pages and using the “Manage content access” option to remove the checked option for that piece of content and reverting to standard settings
- visiting the Content Controls page and removing the exemption there
Tip: Changing the settings directly from the resource page is particularly useful if you wish to provide your users with temporary access to specific resources, perhaps during one class.
You can allow access at the start of the session and then revert your account back to your previous settings quickly and easily at the end, without navigating away from the resource page.